Wednesday, 12 June 2019

Final Assignment Part 2: In-Class Essay

By the end of block 5 (June 12) you are responsible for submitting a 3-4 paragraph essay that answers both the following questions and includes the following information


  1. Include an Introduction and Conclusion 
  2. Since the start of the year (or from when you enrolled) how has your perception of a "good picture" changed? Explain.  
  3. Discuss three or more different elements you will now consider when taking a photograph and why they are important to your overall picture. 
  4. If you were to take photography again in the future, what are some ideas you would like to explore and learn about? 
Overall (15 Marks)


Wednesday, 29 May 2019

Final Assignment Part 1: Portfolio

The final assignment of the year will be a portfolio of your best images all year.

Procedure:
  1. This is an individual assignment
  2. You have two options for this portfolio: create a theme or explain to your audience why you chose these particular images 
  3. Upload 25 images
    1. They can be a collection of your best work
    2. You have permission to take new pictures to add to your Portfolio
    3. These images should include examples of everything we have done all year 
  4. For each image, upload a 25-50 word description that explains the picture or why you chose to add that in your best work collection
  5. Title the assignment "Portfolio"
  6. This will be due Monday, June 10
Rubric

Photos (25 Marks)
Description (25 Marks)
Overall (50 Marks)


Thursday, 23 May 2019

Double Colors Exposure Assignment

The goal of this assignment is to show an understanding of how double color exposure works.

Procedure

  1. Take six different pictures. 3 from the side and 3 from the front
  2. After you have all six pictures, upload them to Photoshop and select two that you want to use for this assignment. 
  3. Your images must be uploaded on a blank canvas
  4. Change the colors as much as you would like. Try your best to ensure each person is colored differently than the other 
  5. Upload a 50-100 word description outlining how you did this assignment
  6. This will be due on Monday, May 27th
Rubric
Photos (8 Marks)
Description (4 Marks)
Overall (12 Marks)

Double Colors Exposure Lesson

Double Colors Exposure
You will be creating a Double Color Exposure using Photoshop and Portraits to create a color fringing look. You will be taking portraits of your partner in two (or three) different angles. You will need to fill the frame and make sure you shoot from the waist up. It is your decision on the orientation of the images. Although, you will need to make sure that the two images you choose to use are orientated the same way. For example, both should be either horizontal or vertical.
You need 6 different poses: 3- side view and 3-front view. This will allow you to try various color combinations. You must shoot your images on a blank, clean background. The studio works best, but if you can find a nice solid background outside that will work just fine.

Step by Step Guide to Creating Double Color Exposure 

  1. Bring both images into Photoshop, open a new document and and place both images in, onto two separate layers.Then on the top layer click the fx tool [layer styles]button at the bottom of the Layers Palette.
  2. Uncheck the R G B boxes in the advanced blending station. As you click the boxes one-by-one you will see your image change colors. Once you get the color combination you like hit OK.
  3. Then if there is left over space after adjusting where you want the images to be, select a slice of the image with the correct color [make sure it is just the background and does not contain any of the subject inside] using the Marquee Tool.
  4. Then click CTRL + T and it will turn your selection into the bounding boxes to transform it. Pull from the side to stretch it out.
  5. Then add and adjustment layer [selective color] to refine the color combinations you chose.
Double Color Exposure Video 
Watch this Video in order to get a better understanding of how double color exposure works. 

Thursday, 9 May 2019

Recreate a Photo Lesson + Assignment

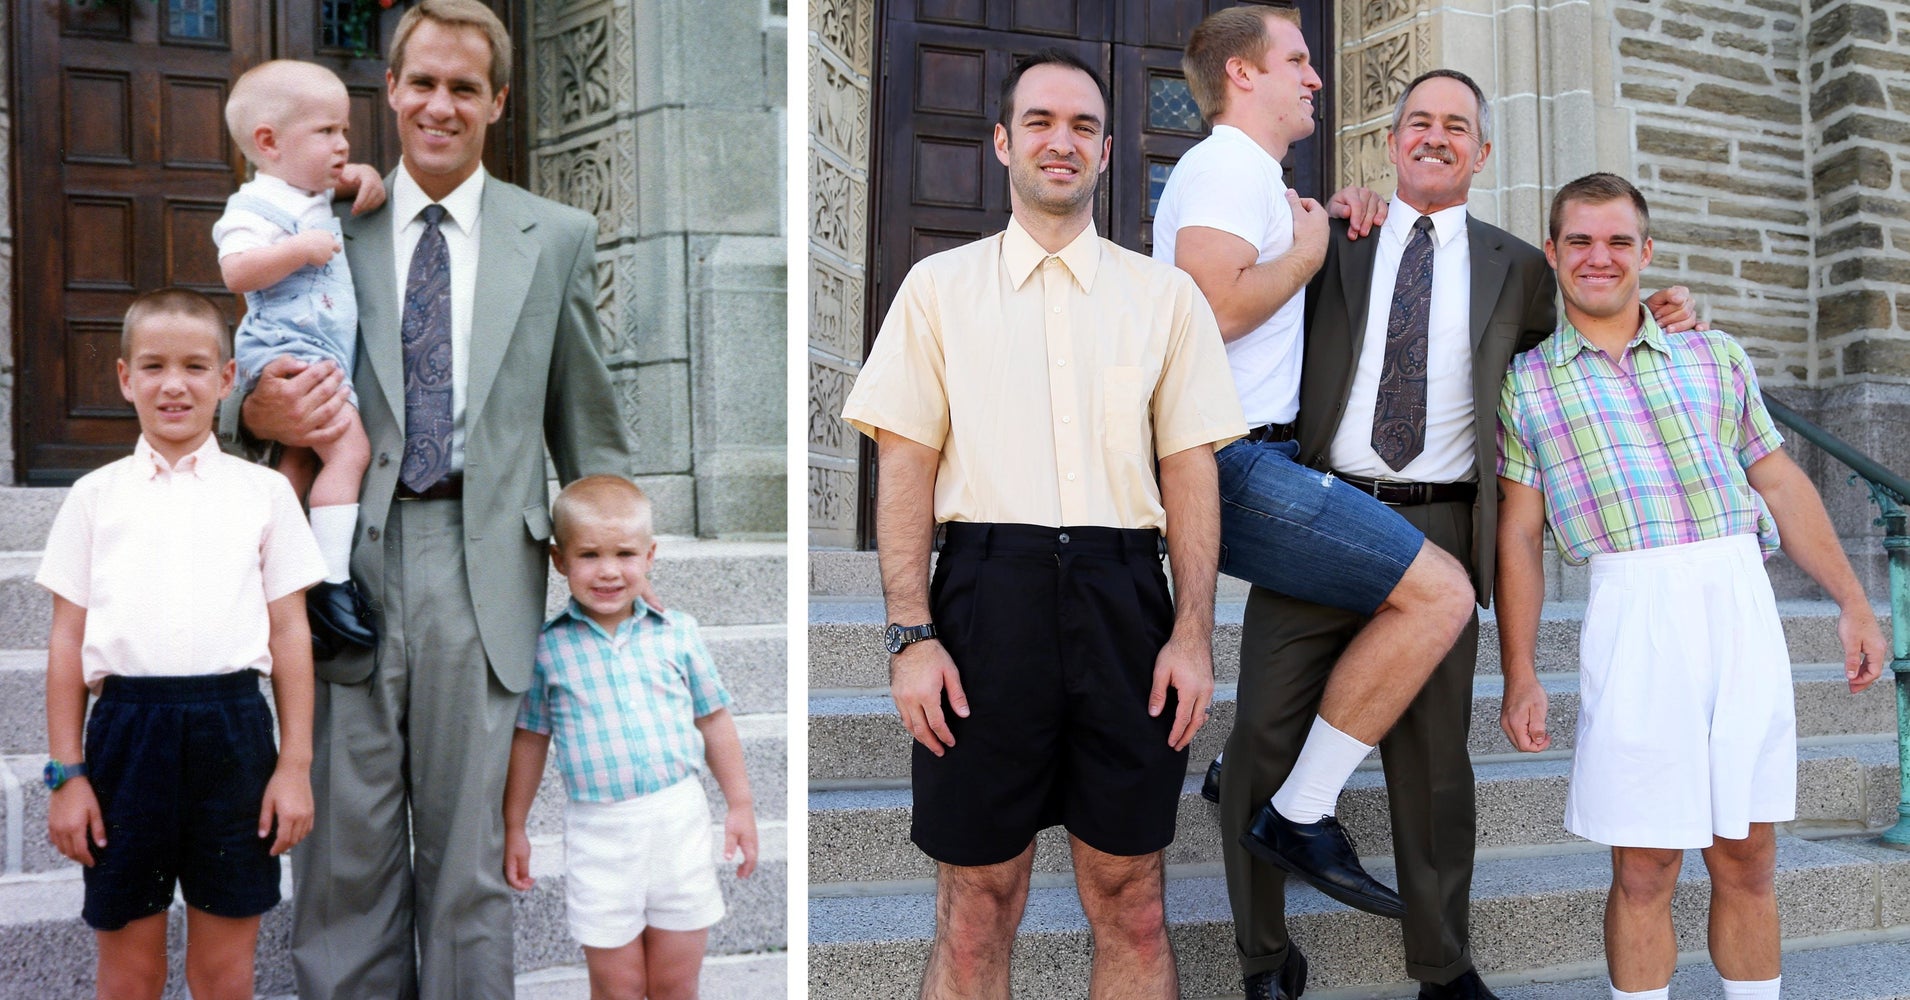
Recreating a photo can be a terrific and fun journey. When people choose to recreate photos it generally will be them recreating something from their past. For example, they may recreate pictures from their childhood as adults or recreate a famous image off of the internet.

Image result for recreate a photo

Now that you have extensive experience with a camera, it is time to recreate a photo yourself or using one from the internet.

Recreate a Photo Assignment

  1. Recreate three different pictures from either your past or from pictures off of the internet
  2. Upload both the original and new photos together onto your blog
  3. Title the assignment "Recreate a Photo Assignment."
  4. Add a 100 word descriptor about the similarities and/or differences in your new photo from the original 
  5. This assignment will be due Tuesday, May 21
Rubric
Photos (6 Marks)
Description (4 Marks)
Overall (10 Marks) 

Friday, 12 April 2019

Stop Motion Photography Lesson 4

Now that we have learned how to create photos, it is important we understand how to assemble the final video product. In order to accomplish this feature, we are going to be using a program called premiere pro.

Steps to Assembling the Video
  1. Starting and Opening a Project
    • Open an existing project (Windows: Ctrl+O, Mac: Cmd+O), or start a new one (Windows: Ctrl+Alt+N, Mac: Opt+Cmd+N) from the Premiere Pro Start screen.If you are starting a new project, the New Project dialog launches. From the New Project dialog, you can specify the name and location of the project file, the video capture format, and other settings for your project.After you have chosen settings in the New Project dialog, click OK.

      2. Capture and Import Video and Audio
    • For file-based assets, using the Media Browser you can import files from computer sources in any of the leading media formats (Windows: Ctrl+Alt+I, Mac: Opt+Cmd+I). Each file you capture or import automatically becomes a clip in the Project panel. Alternatively, using the Capture panel, capture footage directly from a camcorder or VTR (Windows: F5, Mac: F5). With the proper hardware, you can digitize and capture other formats, from VHS to HDTV.You can also import various digital media, including video, audio, and still images. Premiere Pro also imports Adobe® Illustrator® artwork or Photoshop® layered files, and it translates After Effects® projects for a seamless, integrated workflow. You can create synthetic media, such as standard color bars, color backgrounds, and a countdown.

      3. Assemble and Refine a Sequence 
    • Using the Source Monitor, you can view clips, set edit points, and mark other important frames before adding clips to a sequence. For convenience, you can break a master clip into any number of subclips, each with its own In and Out points. You can view audio as a detailed waveform and edit it with sample-based precision.You add clips to a sequence in the Timeline panel by dragging them there You can view the edited sequence in the Program Monitor or watch the full-screen, full-quality video on an attached television monitor. 

       4. Add Titles
    • You can easily create titles directly on your video using the Essential Graphics panel in Adobe Premiere Pro. Use these keyboard shortcuts to create a new text layer (Windows: Ctrl+T, Mac: Cmd+T). You can add text, shapes, and so on, to layers that you can rearrange and adjust.

      5. Add Transitions and Effects 
    • The Effects panel includes an extensive list of transitions and effects you can apply to clips in a sequence. You can adjust these effects, and a clip’s motion, opacity, and Variable Rate Stretch using the Effect Controls panel (Windows: Ctrl+D, Mac: Cmd+D).
    • The Effect Controls panel also lets you animate a clip’s properties using traditional keyframing techniques. As you adjust transitions, the Effect Controls panel displays controls designed especially for that task. Alternatively, you can view and adjust transitions and a clip’s effect keyframes in a Timeline panel. 

      6. Mix Audio  
    • For track-based audio adjustments, the Audio Track Mixer emulates a full-featured audio mixing board, complete with fade and pan sliders, sends, and effects.
      • Audio clip mixer: (Windows: Shift+9, Mac: Shift+9)
      • Audio track mixer: (Windows: Shift+6, Mac: Shift+6)
Video to Assist with Premiere Pro

In order to better understand Premiere Pro, use this video to help you assemble your end product.

Wednesday, 10 April 2019

Stop Motion Photography Lesson 3

Shutter Speed, Aperture and ISO

It is important to consider that many variables will alter how fast the shutter speed will need to be. These variables include the speed of the subject, light source and the angle of where you are taking the shot from. For example, taking images of a moving vehicle or a bird will require a much quicker shutter speed (1/2,000 or 1/4,000). However, taking pictures of something that moves at a slower speed (waterfall, writing/re-arranging letters) will require a much slower shutter speed (1/10, 1/30). Note: if you have a high shutter speed it will lower your depth of field.

In regards to aperture, you will need to manually play around with its settings until you get the proper exposure that you want. Do keep in mind that a high shutter speed will require a wider lens (f/2.8, f/1.5).

Finally, in regards to ISO, if you increase the size it will help your photos receive more light. Do keep in mind that the larger your ISO, the higher of a chance your photo can have "noise."

Overall, everything will depend on what you are trying to create. Expect a bit of trial and error in regards to this. It is still highly recommended you do all of your settings in manual mode as changing it to automatic can change one or more of these settings.

Stop Motion Photography Video

Watch this video to better understand what an end product will look like.